
Guide to Blood Pressure Measurement: Protocols and Pitfalls
There are 4 types of blood pressure measurement devices (sphygmomanometers) are most known for clinics.
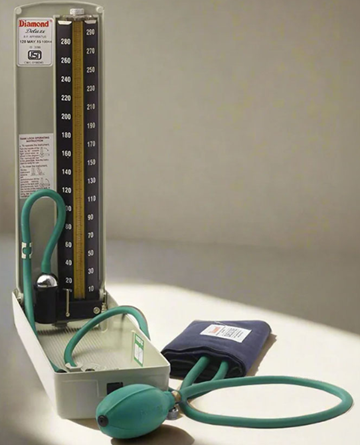
Mercury Sphygmomanometer
The mercury sphygmomanometer measures blood pressure by directly balancing a vertical column of liquid mercury (Hg) against the air pressure generated within the occlusive cuff.
Long regarded as the gold standard of clinical sphygmomanometry.
But it is being phased out due to the environmental toxicity and hazards associated with mercury spills.
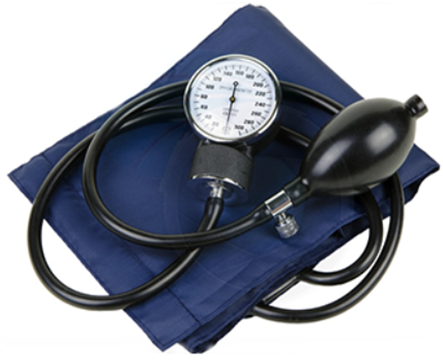
Aneroid Sphygmomanometer
This registers BP on a circular dial which is calibrated in millimeters of mercury (mmHg).
Highly lightweight and portable, BUT susceptible to mechanical shock—such as accidental dropping or jarring during transport—which causes a loss of baseline calibration.
Therefore, aneroid devices require regular maintenance, and routine re-calibration against a reference standard to maintain clinical accuracy.
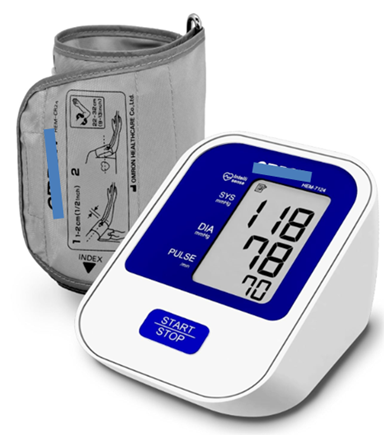
Electronic (Digital / Oscillometric) Device
These substitute manual auscultation with automated pressure sensors that detect arterial wall oscillations transferred to the cuff as it deflates across the brachial artery.
Built-in microprocessors apply algorithms to calculate and estimate the systolic and diastolic BP values.
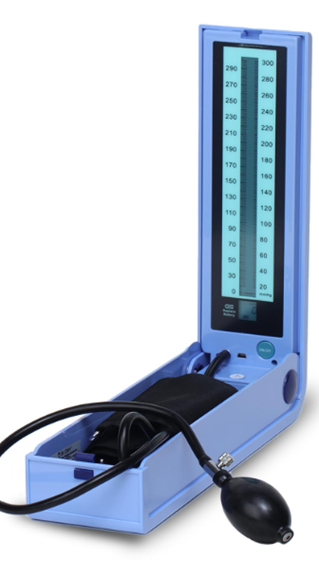
Hybrid Device
Hybrid devices combine the reliability of traditional methods and modern safety standards by pairing
- Manual auscultation (listening for Korotkoff sounds through a stethoscope) with
- An electronic pressure display system.
In these, the hazardous mercury column is replaced by an electronic pressure transducer that displays cuff pressure as
· a digital readout,
· an aneroid-style dial gauge, or
· a simulated LCD mercury column.
Note: Routine Calibration & Validation is a MUST regardless of the device type used, for accuracy.
Steps for Measuring Blood Pressure
1. Patient Preparation and Positioning
· The patient must rest in a calm environment for at least 5 minutes prior to obtaining the reading.
· The patient must abstain from
o Caffeinated beverages (e.g., coffee, tea) for at least 1 hour prior to assessment
o Smoking and Tobacco use for at least 30 minutes prior to testing.
· The patient must avoid any strenuous physical activity for at least 30 minutes before the test.
· Posture
o Seat the patient comfortably with back firmly supported.
o Keep the patient's feet flat on the floor with their legs uncrossed.
· Bare the measurement arm completely (or place the cuff over a very thin sleeve, avoiding bunched, thick clothing)
· Support the arm on a flat surface at heart level (mid-sternum).
· Enforce no speaking during or between readings by either the patient or the examiner.
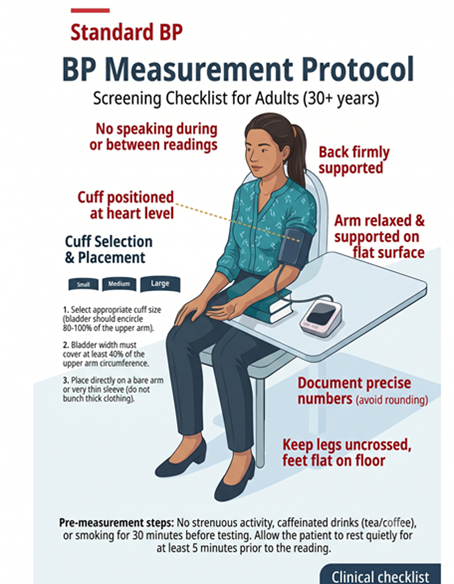
2. Cuff Size Selection
An appropriately sized cuff and correct anatomical placement are critical for correct BP measurement
Bladder Width: The inflatable inner bladder width must equal approximately 40% of the upper arm circumference (roughly 12 to 14 cm in an average adult).
Bladder Length: The inflatable inner bladder length must equal at least 80% of the upper arm circumference (sufficient to cover 80% to 100% of the arm's circumference).
The standard adult cuff has an inflatable bladder measuring exactly 12 × 23 cm.
Too Small or Narrow: Requires excessive inflation pressure to compress thick soft tissues, resulting in an artificially inflated reading (higher than actual BP).
Too Large or Wide: Spreads inflation force over an overly broad surface area, requiring less pressure to compress the artery and yielding an artificially depressed reading (lower than actual BP).
3. Position the BP cuff and the arm
a) Position the patient's arm supported at heart level.
b) Unfurl the cuff and center the inflatable inner bladder directly over the brachial artery.
c) Position the lower border of the cuff 2 to 3 cm above the antecubital fossa crease.
d) Wrap and secure the cuff snugly around the bare arm.
e) Flex the patient's arm slightly at the elbow joint.
Clinical Warning: A loose-fitting cuff or an inflatable inner bag that bulges out from its outer sleeve during inflation requires higher pressures to compress the artery producing artificially high BP reading.
4. Decide how much to inflate the cuff (The Palpatory Method)
- Palpate Radial Pulse: Locate and maintain a steady palpation of the patient's radial pulse at the wrist.
- Inflate to Disappearance: Rapidly inflate the cuff until the radial pulse is no longer palpable, noting this exact pressure level on the manometer gauge.
- Calculate Target Inflation Pressure: Add 30 mmHg to the pressure reading at which the radial pulse vanished. This sum is the target inflation pressure for the subsequent auscultatory phase.
Why? This calculation prevents over-inflation, protecting the patient from unnecessary discomfort while guaranteeing that cuff inflation extends safely above any potential ‘Auscultatory gap’.
4.Deflate the cuff completely and wait 15 to 30 seconds before proceeding to auscultation. This brief pause allows trapped blood to drain from the forearm veins, preventing local venous engorgement and restoring baseline arterial dynamics.
5. Determine Systolic & Diastolic BP (Auscultatory Method)
Stethoscope Bell Placement: Place the bell of the stethoscope gently over the brachial artery at the antecubital fossa, ensuring that the entire circular rim forms a complete, airtight skin seal.
Why Use the Bell? Korotkoff sounds are generated by low-pitched frequencies. The bell piece is designed to amplify low-frequency sounds more effectively than the diaphragm.
Measure the Systolic Blood Pressure First
· Inflate the cuff rapidly to the ‘Target level’ calculated in previous steps
· Then carefully release the valve to deflate the cuff slowly @ 2 – 3 mm Hg per second
· Keep eyes on the level and note when you first hear the sounds of at least two consecutive beats.
· This is the systolic pressure
Measure the Diastolic pressure next
Identify Diastolic Pressure (Korotkoff Phase V): Continue slow deflation.
As cuff pressure drops, the tapping sounds
· change in quality,
· become muffled (Phase IV), and
· eventually disappear entirely (Phase V).
Record the diastolic blood pressure at the exact point where all sounds DISAPPEAR.
6. Confirmation & Deflation: Continue slow deflation for another 10 to 20 mmHg past the disappearance point to confirm absolute silence,
Then open the valve fully to deflate the cuff rapidly to zero.
After sufficient clinical experience, an examiner may rapidly inflate the cuff while palpating the radial pulse until it disappears, immediately continue pumping 30 mmHg higher, and transition directly into controlled slow deflation for systolic and diastolic auscultation.
Caution: Beware of The Auscultatory Gap: Diagnostic Pitfalls & Pathophysiology
The diagnostic thresholds for office blood pressure values in adult patients are classified as below:
| Category | SBP(mm Hg) | DBP(mm Hg) | |
|---|---|---|---|
| Optimal | <120 | And | <80 |
| Normal | 120 – 129 | and/or* | 80 – 84 *If SBP & DBP fall into different categories, the higher category applies |
| High Normal | 130 – 139 | and/or | 85 – 89 |
| Grade 1 Hypertension | 140 – 159 | and/or | 90 – 99 |
| Grade 2 Hypertension | 160 – 179 | and/or | 100 – 109 |
| Grade 3 Hypertension | ≥ 180 | and/or | ≥110 |
| Isolated Systolic Hypertension | ≥ 140 | and | < 90 |
| Hypertensive urgency ** | >180 | and/or | >110 |
| Hypertensive emergency ## | >180 | and /or | >110-120 |
**Severe hypertension BUT asymptomatic & with no evidence of acute target organ damage
##Severe hypertension along with end organ damage like cardiovascular (e.g. left ventricular failure), cerebral (e.g. hypertensive encephalopathy, stroke), renal (ARF), Grade III-IV retinopathy
Remember:
Averaging Readings
· Obtain a minimum of two readings and average them.
· If the initial two readings differ by more than 5 mmHg, obtain additional readings and calculate their mean.
· Allow a minimum rest interval of 2 or more minutes between consecutive cuff inflations.
Bilateral Arm Evaluation
· Measure BP in both arms at least once during baseline clinical assessment.
· A normal physiological difference between arms ranges from 5 to 10 mmHg.
· Subsequent routine assessments must always be performed on the arm demonstrating the higher pressure reading.
An inter-arm pressure difference > 10 to 15 mmHg indicates asymmetrical arterial perfusion. This may occur in:
· Subclavian steal syndrome
· Supra-valvular aortic stenosis
· Aortic dissection
Leg Blood Pressure Measurement
Measure BP in the lower limbs at least once in every hypertensive patient to r/o peripheral arterial disease and aortic coarctation.
Select a specialized thigh cuff equipped with an inflatable inner bladder measuring 18 × 42 cm.
Apply the cuff at mid-thigh, centering the bladder over the posterior surface of the thigh, and wrap it snugly.
Auscultation: Position the stethoscope over the popliteal artery.
Patient Positioning: Place the patient in the prone position. If the patient cannot tolerate lying prone, maintain a supine position with the target leg slightly flexed at the knee and the heel resting flat on the bed.
Postural Hypotension Assessment: Should be done for diabetic patients and those aged >65 years:
- Measure blood pressure while the patient is resting in a supine position.
- Instruct the patient to stand, and re-measure blood pressure 2 minutes after assuming the standing position.
Special Situations in BP measurement
A diagnosis of hypertension is incomplete without these five diagnostic evaluations
Factors influencing BP measurement accuracy
References
Bickley, L. S., & Szilagyi, P. G. (2020). Bates' Guide to Physical Examination and History Taking (13th ed.). Wolters Kluwer.
Government of India (2016). Standard Treatment Guidelines - Hypertension. Ministry of Health & Family Welfare, New Delhi.
India Hypertension Control Initiative; Guide for Medical Officers. Ministry of Health & Family Welfare, New Delhi.
Cavallini, M. C., Roman, M. J., Blank, S. G., Pini, R., Pickering, T. G., & Devereux, R. B. (1996). Association of the Auscultatory Gap with Vascular Disease in Hypertensive Patients. Annals of Internal Medicine, 124(10), 877–883.
Askey, J. M. (1974). The Auscultatory Gap in Sphygmomanometry. Annals of Internal Medicine, 80(1), 94–97.